---
title: "EasyPost Setup"
description: "Set up EasyPost for automatic shipping label generation."
url: "https://docs.gytabuyback.com/getting-started/easypost-setup/"
---
## Sign Up for EasyPost
To enable automatic shipping label generation, sign up for a free account at [easypost.com](https://www.easypost.com).
EasyPost provides access to discounted USPS, UPS, FedEx, DHL, and more through a single API.
## Get Your API Keys
After signing up, sign in to your EasyPost dashboard.
Click your account name, then **API Keys**. Copy both your **Production** and **Test** keys.
**Test vs Production keys:** Test keys (starting with `EZTK`) create test labels that are not charged. Production keys create real, billable labels. Use Test mode while setting up.
## Set Up Carriers
In your EasyPost dashboard, enable carriers under **Carrier Accounts**. USPS is available by default. To add UPS, FedEx, or others, follow EasyPost carrier setup instructions.
## Add API Key to Plugin
Navigate to the **Gyta Buyback → EasyPost** tab. Paste your key into **API Key** and save.
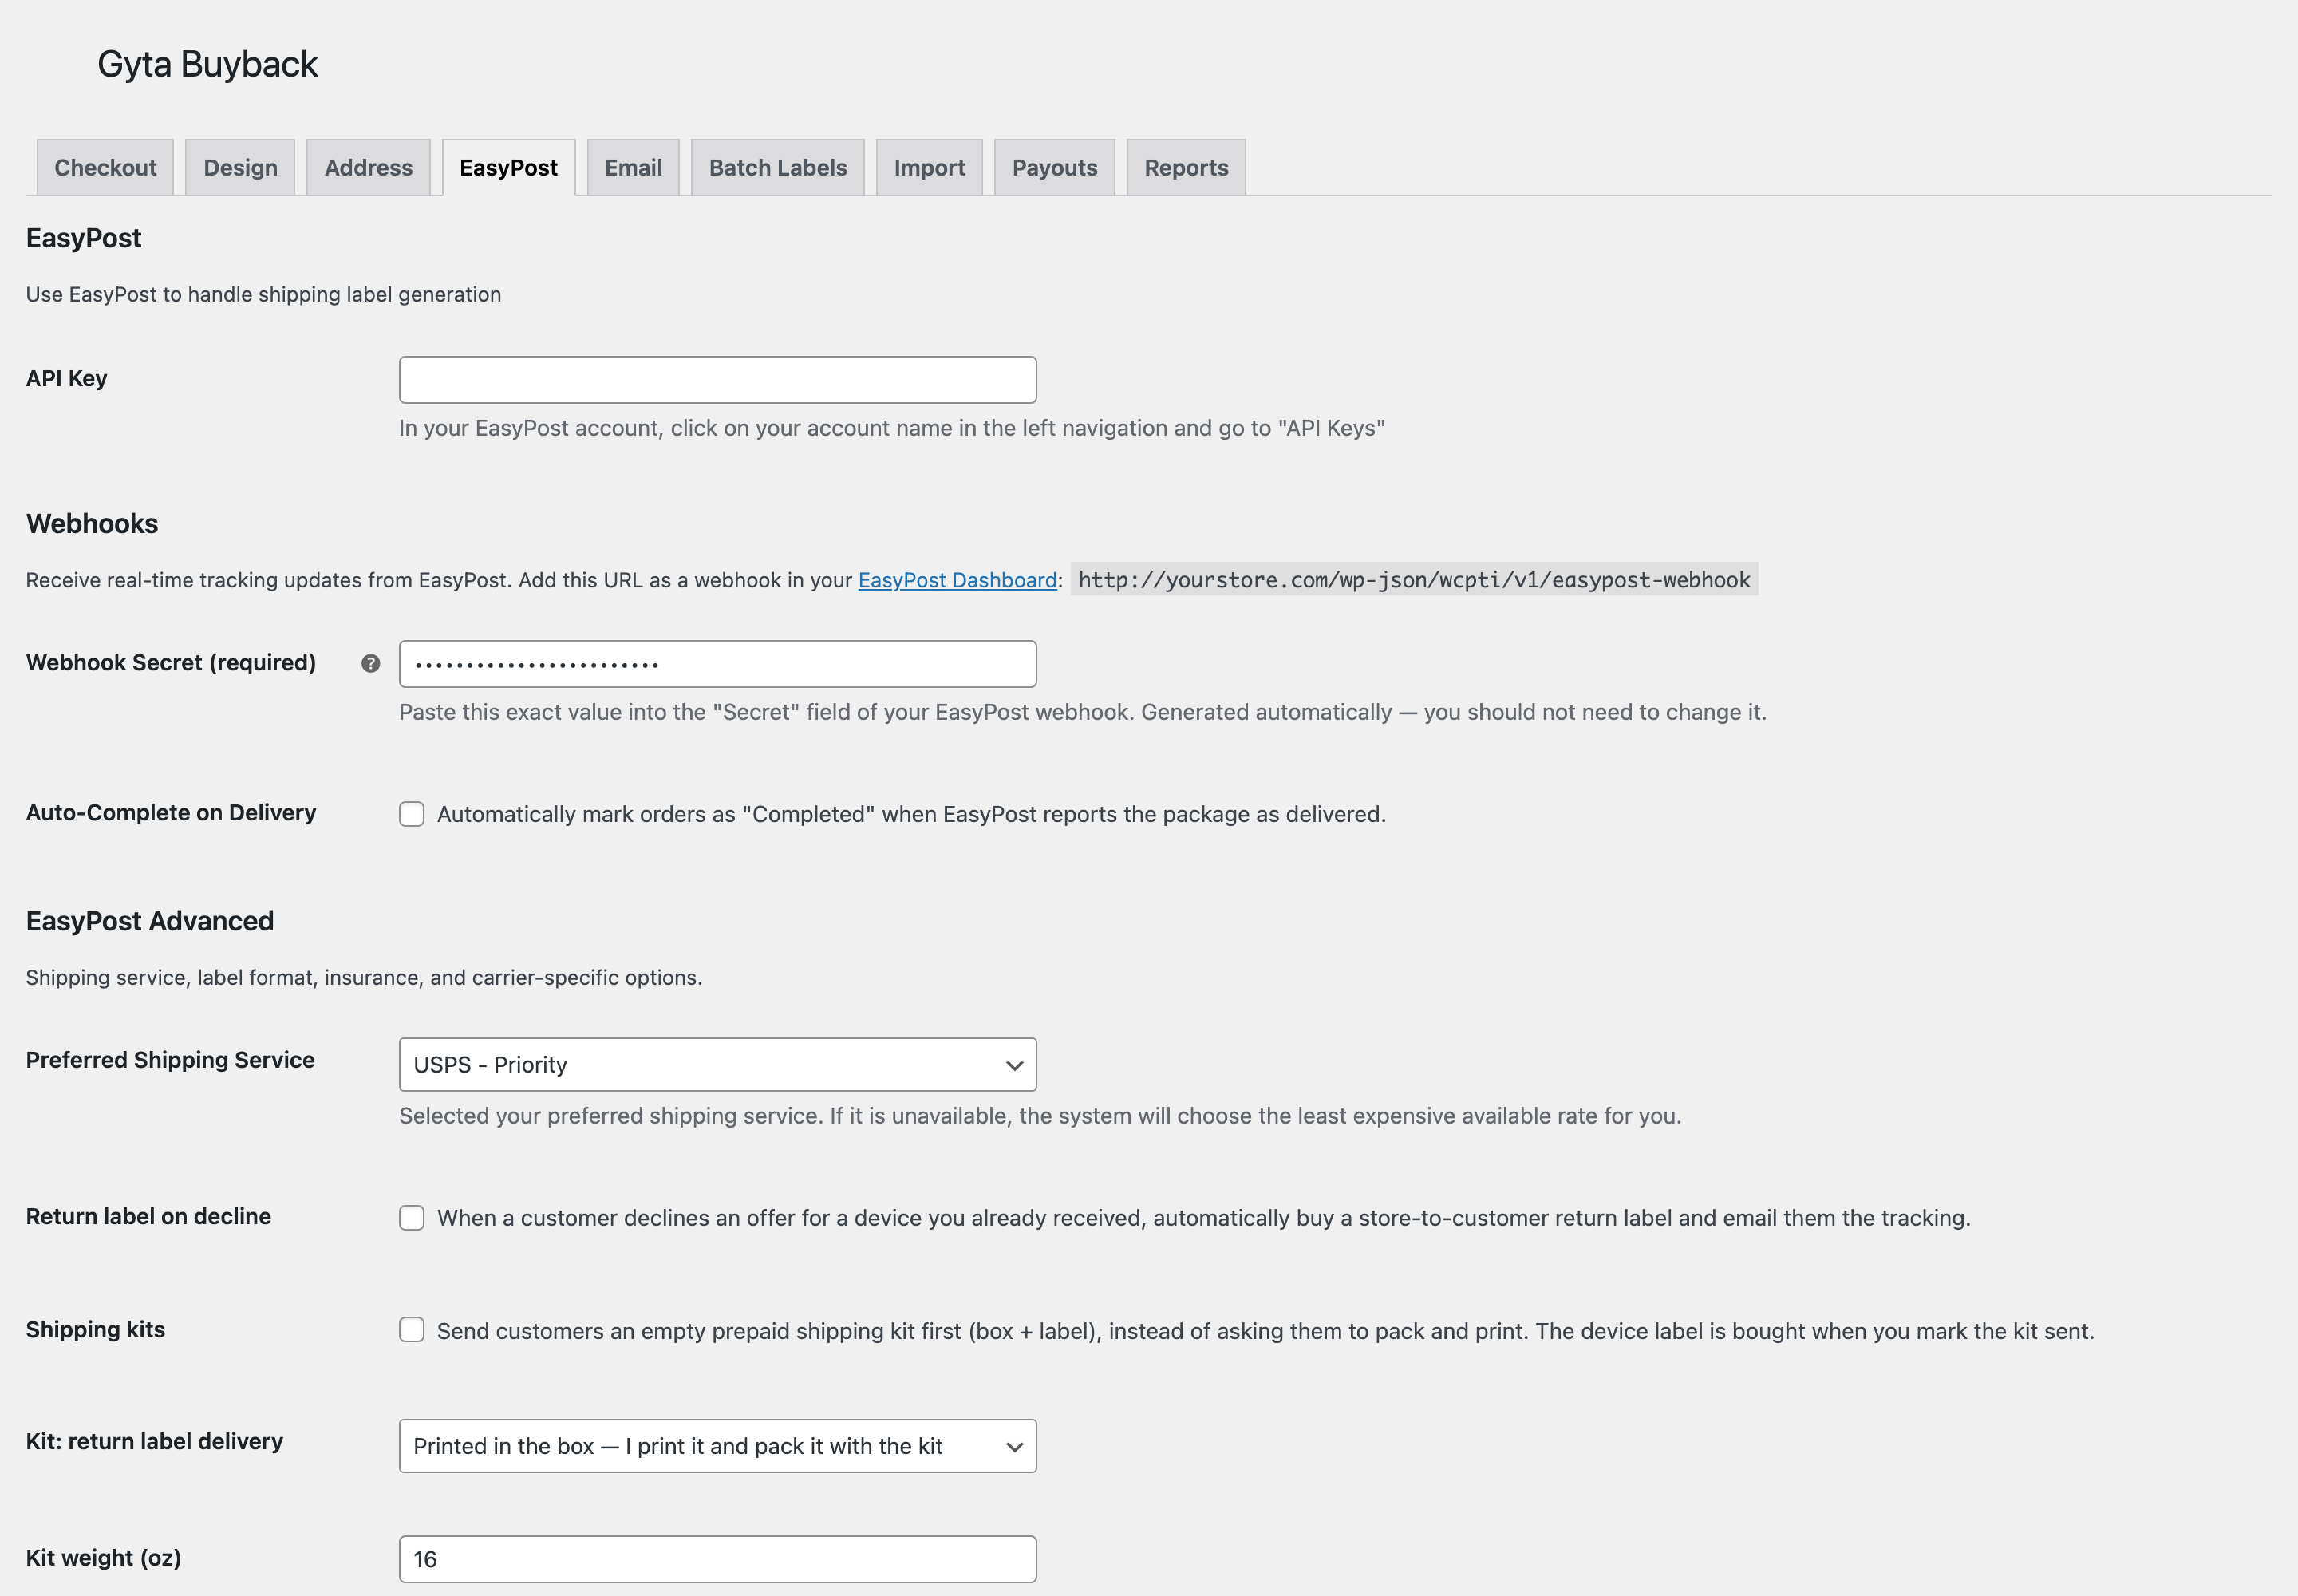
The same tab holds the webhook URL to paste into EasyPost (which is what auto-completes orders on delivery) and, under **EasyPost Advanced**, the preferred carrier service, return-label-on-decline, and shipping-kit options.
The plugin automatically detects whether you are using a test or production key and displays the current mode.
## Next Steps
With EasyPost connected, prepaid labels are generated automatically:
* See how labels are created and formatted in [EasyPost Shipping](../../features/easypost-shipping/).
* Turn on real-time tracking and auto-complete on delivery with [Webhooks](../../features/webhooks/).